With the realization that the pandemic will continue through the winter, pretty much everyone is doing some preparatory "nesting", getting ready to spend the cold season at home. There's been a run on patio heaters and fire pits as folks look to extend the cozy backyard season into the colder months. I bought a small tabletop patio heater, which works nicely for a couple of people around a table, say eating a meal together. I didn't get the big eight foot tall kind because, quite frankly, I couldn't be bothered dealing with such a huge thing and the associated tanks of propane (which, it turns out, are in more plentiful supply than the 1 lb. tanks that power my little heater). I also own a metal firepit, but it's a little decrepit and besides, fire pits are nice, but a backyard fire is smoky and everyone winds up on shpilkes constantly getting up and moving positions around the fire like weathervanes to stay out of the smoke as the plume shifts.
I also happen to own an antique cast iron wood stove. This stove was décor in my parents' house - never hooked up for use, just on display. We referred to it as a "potbelly stove", but in fact that's the wrong term, as it doesn't bow out in a shape that merits that name. Generically, it is a "parlor stove" - a small ornamental stove meant to heat a room rather than a house. It is cylindrical in shape, and I've seem this type of stove referred to as a "cylinder stove". They are also sometimes called "oak stoves". This stove bears a "Manor Oak" nameplate, though the parts are stamped "Park Oak". Apparently, Round Oak Stove Company of Michigan was the Cadillac of stoves in the day, which I suspect is where the "oak stove" term comes from. I also suspect that all these other "Such and Such Oaks" were knockoffs capitalizing on the name. See what you can learn on the Internet?
Anyway, somewhere in my online reading about stoves I had seen an example of someone using one as a patio heater, and I thought "ah ha!". I had been displaying the stove in my home office (Valerie barred it from the rest of the house, having reached her limit of acceding to displaying threadbare Aronson heirlooms) but after seeing the online post I realized it could be put to good use on the patio. A cast iron woodstove can throw off a lot of heat, and it contains smoke a lot better than does a fireplace. Yeah, you don't get the charm of the feel of an open fire, but you get lots of warmth with less smoke.
There was only one problem. Sometime - probably in the 50's or 60's - a painter working at my parents' house had talked them into letting him do an artistic paint job on the thing. While the paint job gave it a kind of European look (not universally beloved - see previous mention of Valerie's feelings about the stove), it was done without utility in mind. The paint was not high temperature paint and who knows what kind of fumes would come off the thing if a fire was lit in it. I resolved to strip that finish off and recoat it with stove paint. The stove also had suffered various indignities, including taking a nice swim during Hurricane Sandy, so it needed some minor fixing up. It would have needed more fixing up for indoor use - making sure it was sealed so fumes didn't leak out, and so on, but that level of restoration wasn't necessary for my outdoor application.
 |
| Here's the stove in its old paint job |
Stripping the Stove
My first thought was to have it sandblasted, but that proved to be an expensive proposition. In a way I'm glad I didn't go that route, because it probably would have stripped everything off down to the bare metal. One thing I discovered as I worked on it was that various parts - most of what had been painted black in the "artistic" paint job - had been plated (maybe nickel?) and underneath still had something of a shiny metal finish to them (I had seen similar looks online in pictures of restored stoves). On my stove the parts are pitted and the plating is far from perfect, but I resolved to leave those as-is once I got the paint off them rather than covering the remaining plating with paint.
Actually, it was the nickel-plated pieces that lured me into this crazy project. There are some parts of the stove - the ring near the top, and the skirts near the bottom - that come off easily with no tools. When I got the idea of doing this project I pulled those parts off and as a test tried stripping them - and wow, it was easy to remove the paint! I guess paint doesn't adhere all that well to shiny metal surfaces. That early test gave me a what turned out to be a false impression of how easy the whole paint removal process was going to be.
To remove the paint I first coated the stove with Citrus Strip paint stripper, which did a better job on some parts than others. As mentioned, the nickel plated parts came clean pretty easily, while the paint clung tenaciously to the cast iron. At the recommendation of several friends I decided to light the stove up to see if heat would burn off the paint, which, to a major extent it did. I stayed far away from the stove while it burned, as it smelled pretty bad as the paint burned off (lead paint? burning paint stripper residue? who knows ...). Unfortunately, the fire didn't take everything off, as the parts of the stove beyond the main cylinder don't get very hot.
 |
| Firing it up to try to burn off the old paint |
 |
| Various stove parts during stripping |
I then attacked it with more paint stripper, hand and electric wire brushes, and an electric sander. I wanted to get it clean enough that I wouldn't have to worry about more paint burning off, and so that a new finish would have a clean surface to which to adhere. I would have loved to have gotten 100% of the old paint off, but as I worked on it and worked on it and worked on it I realized that I was never going to achieve that goal. Oh well, I said to reassure myself that the 80% solution was OK, it's just being restored for backyard use anyway, not for display or for antique resale value.
The job included partially dismantling the stove so I could get access to all the nooks and crannies. I was pleasantly surprised to discover that a number of parts of the stove came off pretty easily. To really do the job right I would have had to have broken the whole stove down, but that would have involved fighting with a lot more antique rusty screws and for my purposes partial disassembly was enough. I did manage to take off both doors, the crown, and the Manor Oak name plate. I was also able to get the view window frame off, which was important for window restoration (more on this later).
 |
| Lower door showing vent |
Through watching a YouTube video about how to operate a stove like this I had learned that the little round things on the two stove doors are actually vents that control airflow to the fire. They had been screwed shut for I don't know how long - at least half a century, probably longer - and had gotten bathed in seawater during Hurricane Sandy and so I was amazed when I was able to get them turning with only a modicum of effort. Basically, all I did was clamp the handles in a vise and turn the doors, and that little bit of leverage was enough to get the vents unstuck. I did hit them with a little Naval Jelly to try and take some of the rust off, but once I start using it they'll just rust up again so I didn't put too much effort into rust removal.
Painting
There are various products you can use to finish cast iron stoves - something called stove black, which seems to need frequent reapplication, high temperature spray paint (meant for things like stoves and BBQ grills), and "Stove Bright", which I initially thought was a separate product category but is just a brand of spray paint popular among stove aficionados. I went with the regular old Rustoleum high temp spray paint because it was readily available at Home Depot and costs $4 per can.
Prepping cast iron isn't easy, as the stuff rusts as fast as you can strip it. I fretted about painting over rust and little bits of leftover paint, but after seeing people on YouTube spray paint over thin rust like I have on the stove, I decided to just go for it. I applied three coats. The first went on easily. The paint instructions say to recoat within one hour or after 48 hours - I guess that within one hour the paint is still wet enough that a second coat just blends in and it all becomes one big coat, and after 48 hours it's probably thoroughly dried. I applied a second coat about an hour after the first, and it went on smoothly. It was getting dark by then, so I waited 48 hours before applying a third coat. The third coat didn't go on quite as well. There's a little crackling in places, but I think it's good enough - and even if it peels off, there are two additional coats beneath it.
 |
| Before painting |

View Window
Looking at front of the stove you can see that it has a view window on the larger door so you can check on the fire when it's burning and get a little glimpse of the flames. The problem is, for as long as I can remember the glazing of that window has been missing - it was just open. That's fine for a piece that's just on display, but having smoke pouring out of that window (as happened when I lit the stove to burn off the old paint) negates the whole low smoke idea, so I set off in search of replacement glass. I figured I would use some sort of high temperature glass like you see in modern stoves and fireplace doors, or maybe just use some decorative perforated metal or lattice. Metalwork wouldn't be perfect, as it would neither totally seal against smoke nor allow a good view of the fire, but I figured it might be easier to work with than glass and might be a way to address the fact that I had to fit curved openings in the door - and glass is usually flat.
Then, through some online research I discovered that the material in these viewing windows was often not glass but rather thin mica known as eisenglass. Eisenglass sheets have the appearance of plexiglass, can take very high temperatures (up to 1800° F, well above the temperature at which the stove will burn), the thin sheets are easy to cut with scissors and best of all, are flexible enough to handle curved surfaces! I guess eisenglass is durable, too, since in horse and buggy days it was used for carriage windows - something you'd already know if you'd paid attention to the lyrics of the classic song "Surrey with The Fringe On Top". Confusingly, there are two other materials referred to as eisenglass (sometimes spelled isinglass) - one made of plastic, and the other of fish bladders! Anyway, we live in miraculous times. I can discover that I need a 4x6" piece of an obscure old-time material I've never before heard of, find a source for it online with nothing more than a quick search, and have it delivered to my door two days later. Amazing. And fortunately, I got the right eisenglass - I didn't open the package to find dried fish bladders.
 |
| Eisenglass cut to size |
The Finished Stove!
After letting the paint dry overnight I put all the pieces together. The lower door had been missing one of its hinge pins - I was able to find a substitute at my local old-fashioned hardware store. I have no idea what the intended purpose of the replacement part is, but it fits perfectly as a hinge pin. The view window went together with new screws, while I used the old screw for the brand plate since it was a pan head that fit the plate perfectly. The stove looks great! See for yourself ...
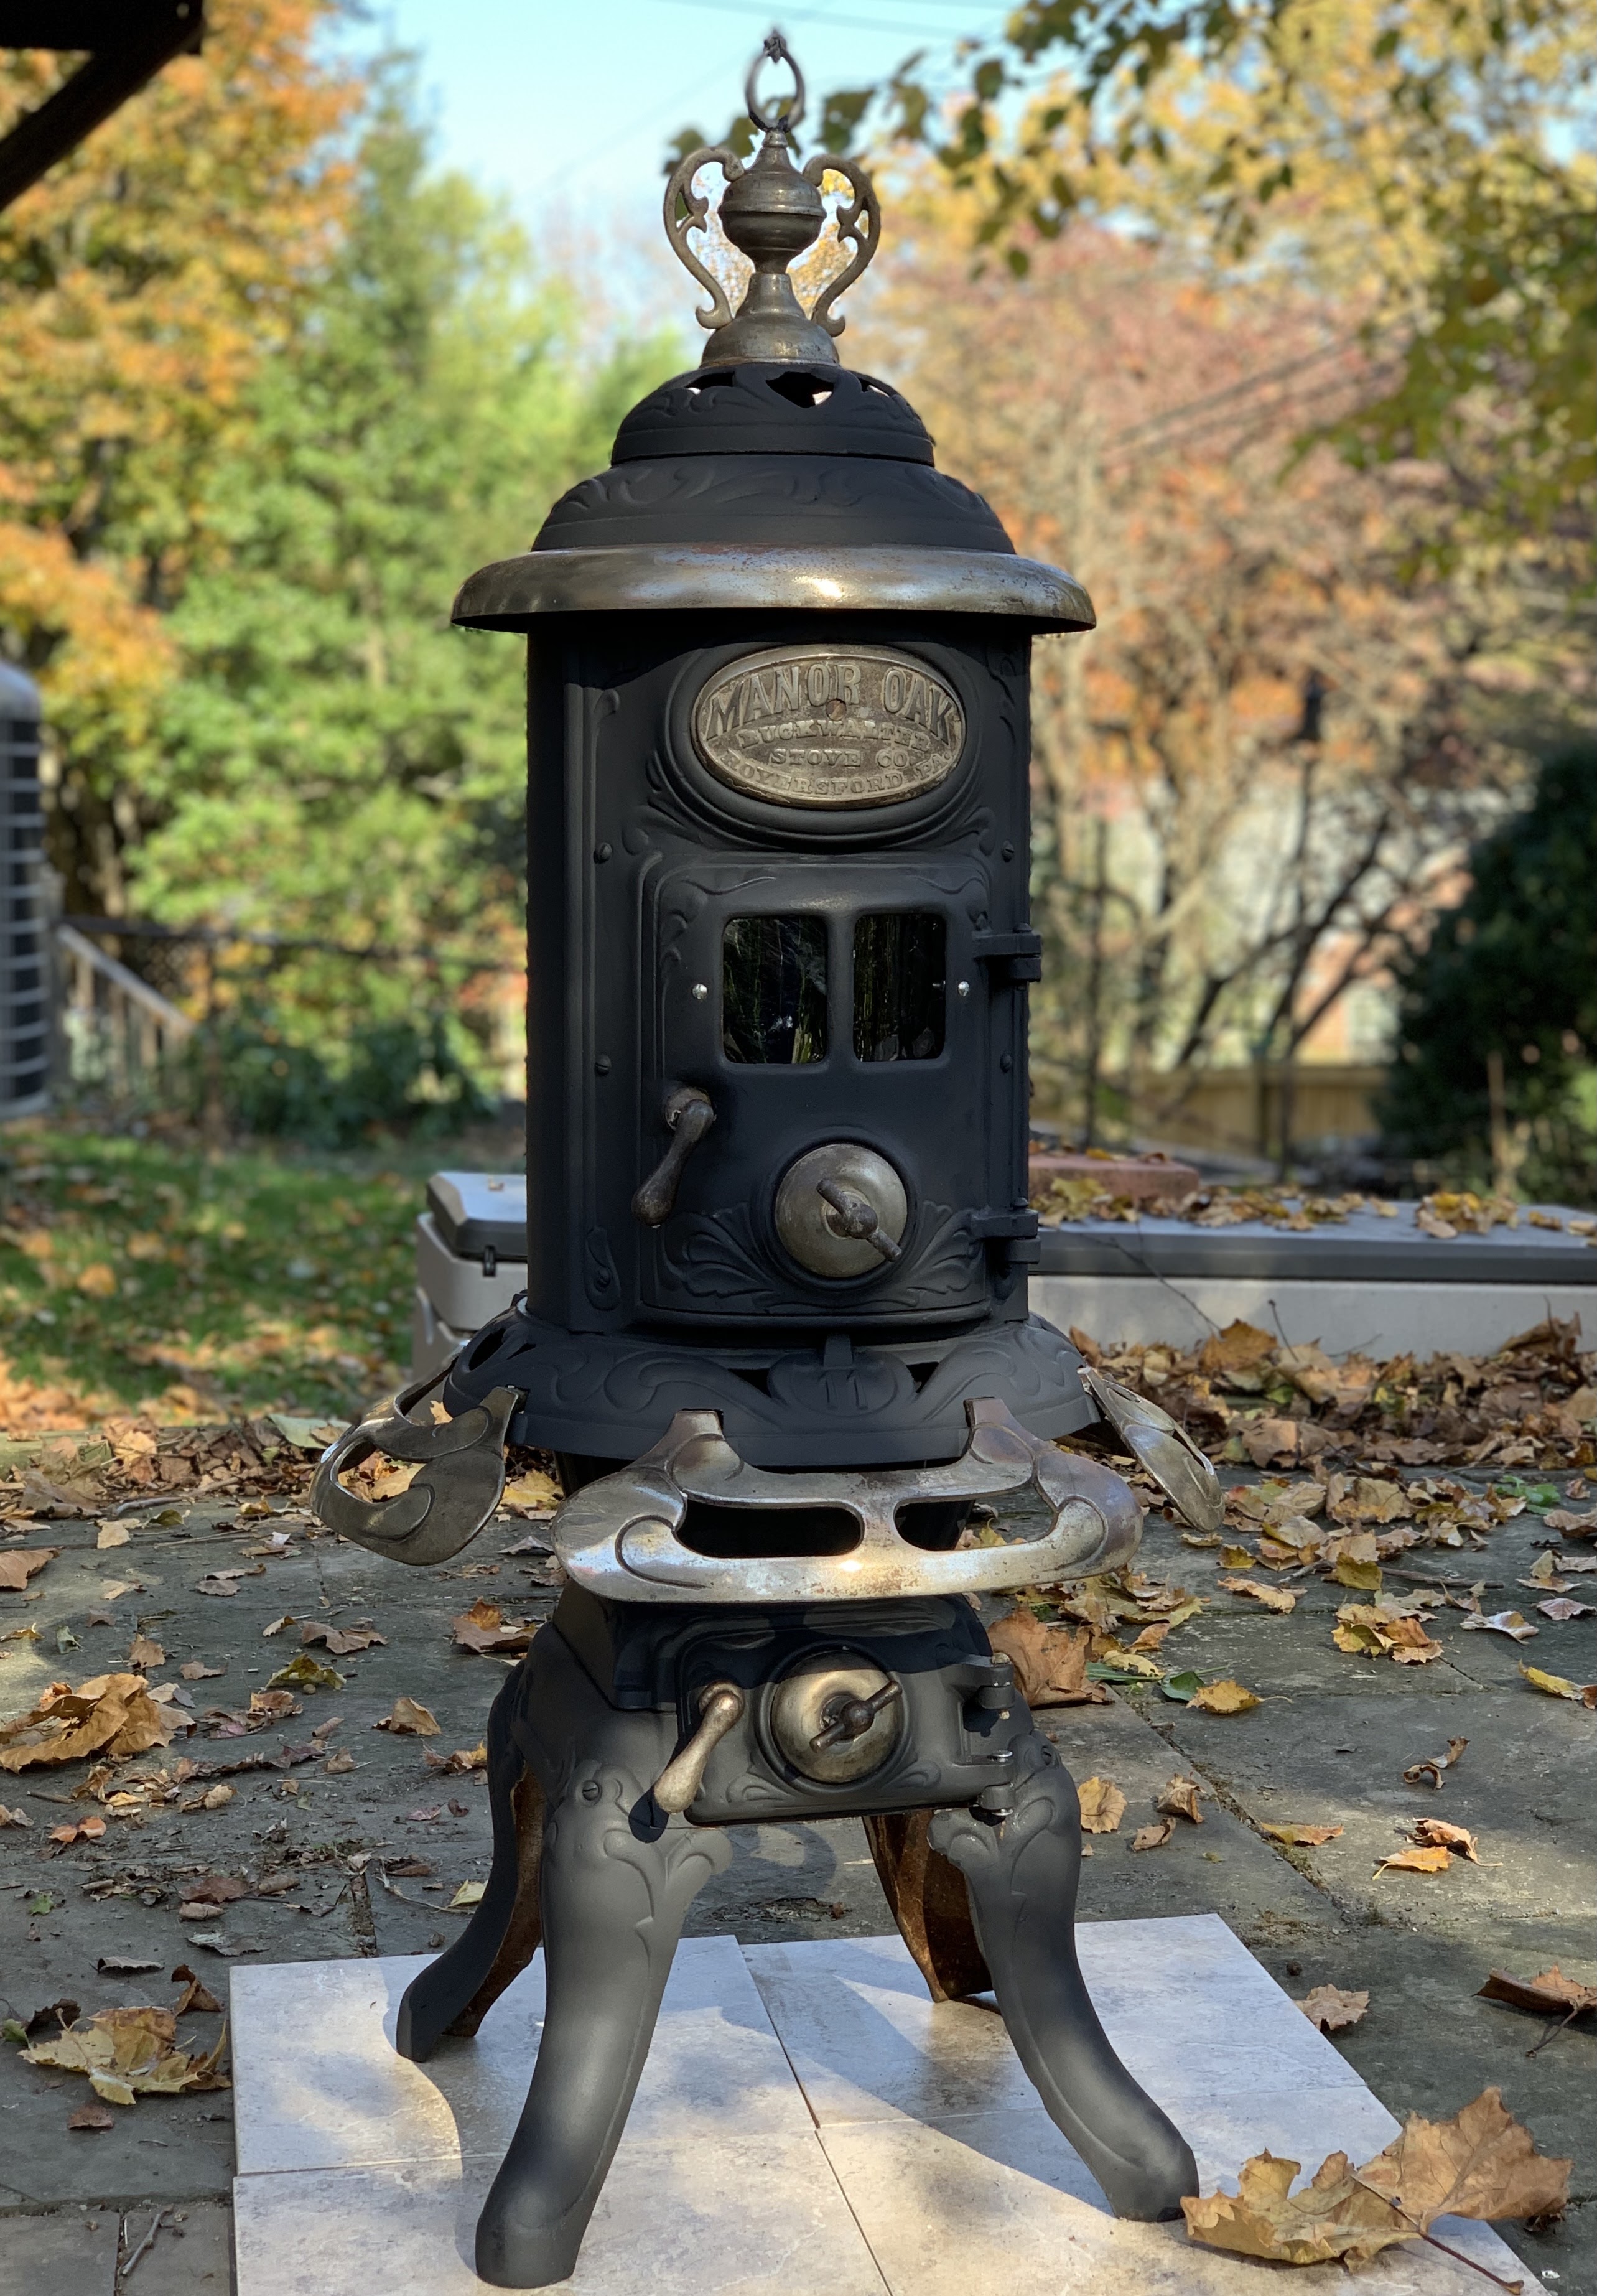 |
| The finished product |
Stovepipe
Now, in terms of making it usable, the stove still as an issue of a big hole in the back where it's meant to connect to a chimney. Once again, my whole idea is to be able to provide heat without dumping smoke on people so a big waist high hole puffing smoke isn't really optimal. I decided to see if I could add a little chimney to the stove. Fortunately, the vent opening is 6", not some weird archaic size like a thousandth of a furlong. 6" vent pipe is fairly standard (of the two local home store chains, Home Depot doesn't carry it, but Lowes does). I ordered two 2' sections of pipe and a 90 degree elbow - which again were delivered to my door. Everything went together pretty much as expected, except what I hadn't realized was that the elbow was something fancy - it's made of various sections that you can rotate relative to one another to get any angle from 45 to 90 degrees. That's a clever design, but not so good for my purposes, since it meant the stack would just flop over sideways. Also, The attachment point to the stove isn't that secure and has only one hole - not really secure enough to hold up a big pipe. Clearly, my stovepipe was going to need supplementary support. Also, I wanted to make it removable so that the stove could be moved and stored. I put on my thinking cap (stovepipe hat?) to try and devise a solution.
What I came up with was using two metal rods as legs for the stovepipe, and a cotter pin to hold the pipe to the stove. The pictures below show a prototype. I had bought two hose clamps to attach the legs but the clamps, it turns out, are too big a size and can't be tightened enough to hold the legs securely, so in the picture the legs are temporarily held in place with wire. I attached the cotter pin to the stovepipe with wire as a "leash" so it doesn't get lost. Actually, I attached two cotter pins since I may yet drill a second hole to make the attachment to the stove more secure. I may also build a base for the legs to hold them in place more securely - likely just a block of wood with two holes in which the legs will sit.
 |
| Elbow attachment using cotter pins (with "leashes") |
 |
| Prototype chimney |
Finally ...
As of this writing I haven't yet tried out the stove. According to the paint instructions, bringing the stove up to high heat cures the paint, and so I really need to do that as a final painting step. I'm not sure what to do about curing the paint on the parts of the stove - like the legs and skirt - that don't get all that hot. I can either leave them as-is or take a torch or heat gun to them. Normally, you'd use heat to remove paint - here I would be using it counterintuitively to improve the paint. I will update the posting with a picture (hopefully not including any firefighters) once I light the stove.
===================================
Update: We have liftoff!
 |
| First fire |
 |
| For nostalgia buffs: here's the stove in my parents' dining room (peeking into the right side of the pic between my brother and what I guess to be my grandfather's arm) =================================== |


1 comment:
i feel your pain but also the thrill of discovery. given that i no longer needed my ovaries i spent 10 years helping chris renovate our old house on capitol hill, spending many hours removing toxic paints and varnishes with equally toxic strippers (um)
we too would have loved to have been able to afford "dipping" the radiators and doors but failing that, steel wool and single edge razors became my preferred tools. the easiest wood to strip was that which had been finished with shellac, the hardest part was getting into the nooks and crannies of the radiators. but the satisfaction with the end result is well worth the work. my best effort was the eventual tung oil finished, chestnut pocket door that we rescued from an alley and installed on the re-revealed hardware.
enjoy your time outdoors with that old beauty. be warm and safe this winter.
Post a Comment